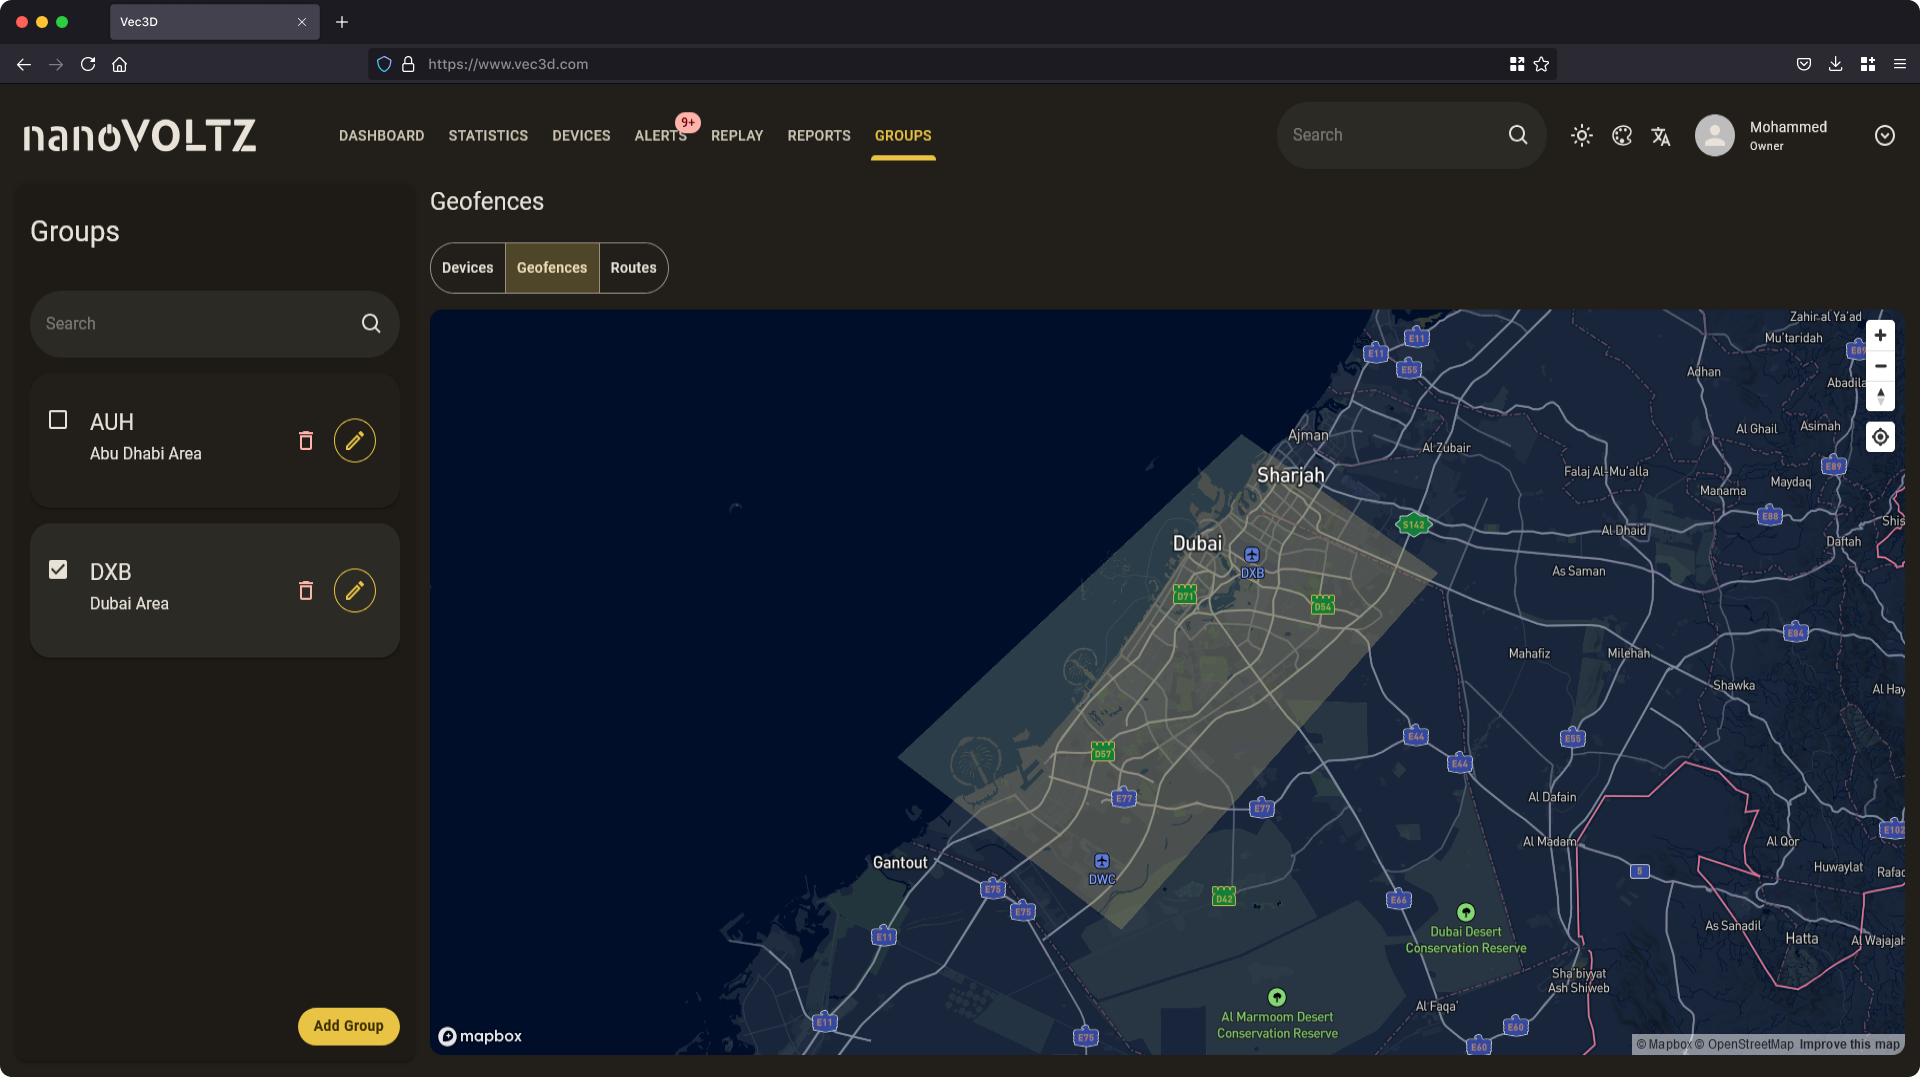
Geofence Groups
The Geofence Groups section allow you to define specific areas for multiple devices. When a device leaves its designated area, an alerts will be generated in the Alerts module.
Overview
The Geofence Groups section allows you to define specific geographic areas for multiple devices. Once a device leaves its designated area, an alert is generated in the Alerts module. This functionality helps track and manage devices within predefined zones for better monitoring and alerting.
Module Components
The section is laid out to provide ease of use and convenience. The section consists of only two parts allowing for the best viewing experience of all data. These parts include:
- Left Sidebar: Contains a search bar, group cards, and an
Add Groupbutton. - Right Panel: Displays the devices in the selected group area on the map.
Searching for a Group
Use the search bar in the sidebar to filter groups by name.
Adding a Group
- Click the
Add Groupbutton at the bottom of the sidebar. - A dialog will appear prompting to enter the group name and description.
- Click the
Saveto create the group.
Editing a Group
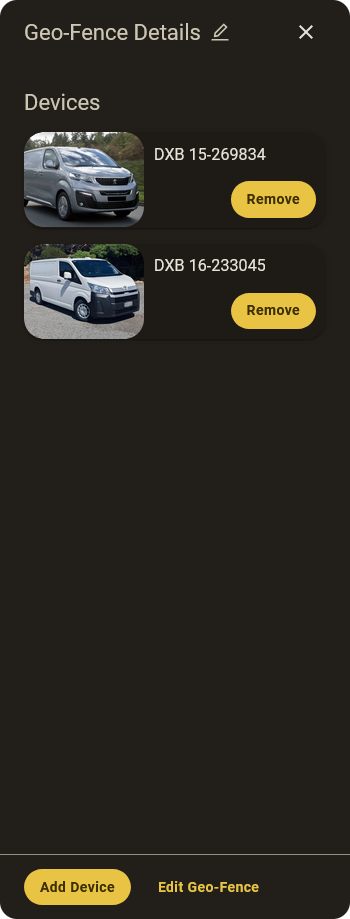
Unlike device groups, clicking the <Edit Icon> button opens a side sheet instead of a dialog. This side sheet displays:
- A title and a pin icon next to it, clicking the icon will show a dialog for edit the group info.
- A list of devices assigned to the group.
- Two action buttons at the bottom:
- Edit Geofence: Used to modify the current geofence area on the map.
- Add Device: Used to add a new device to the geofence group.
Deleting a Group
- Click the
<Trash Icon>button on a group card. - A confirmation dialog will appear.
- Click
Confirmto delete the group permanently.
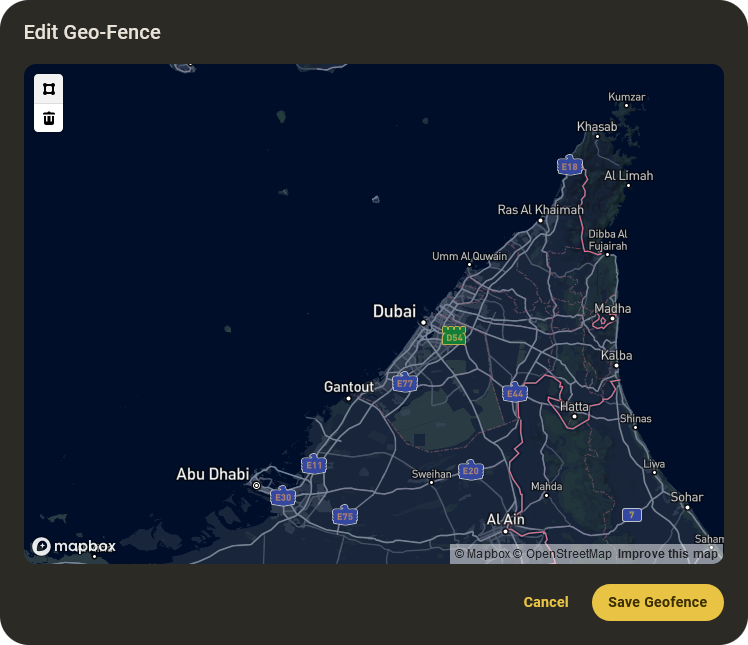
Editing the Geofence Area
- Click the
Edit Geofencebutton in the side sheet. - A dialog will open with a map interface.
- Click anywhere on the map to define the geofence area. A semi-transparent layer will appear, representing the boundary.
- Click
Save Geofencebutton to update the geofence area.
Viewing Group Devices
When you select a group, its assigned devices list appears in the side sheet. Each device card contains:
- Device name and picture.
- A
Removebutton to remove it from the group.
Adding a Device to a Group
- Click the
Add Devicebutton in the side sheet. - A dialog will open with a device selector.
- Select a device and click
Saveto assign it to the group. Similar to device groups, only unassigned devices will be available.
Key Features Recap
- Create and Manage Geofence Groups: Easily organize devices into geofence groups for efficient monitoring.
- Search and Filter Geofence Groups: Use the search bar to quickly locate specific geofence groups by name.
- Define and Edit Geofence Areas: Modify geofence boundaries on a map to reflect the desired zones.
- Add or Remove Devices: Effortlessly add or remove devices from geofence groups to tailor configurations.
- Delete Groups: Remove groups permanently to maintain an organized structure.